")
Lost in the Terra Dome of Pragmata’s Sector 3? The third Sector of Pragmata is full of lush greenery gone out of control. The Terra Dome trades the cityscape and alleyways of the previous level for the tree-lined paths of a dense forest enviroment, and it’s all very beautiful at first – until you notice the enemies hiding in the shadows of these roots that have grown just a little too large. Hugh and Diana will need to weave and bob between the shrubs as they attempt to assist Eight, another lost soul aboard the Cradle who seems to have fallen victim to the wrath of IDUS as well.
This artificial nature reserve features all of the collectibles that you’ve come to expect from Hugh and Diana’s journey thus far, along with winding paths and even the occasional wild animal (they’re still artifical holograms and Lunafilament creations, alas). This guide presents a full walkthrough for Sector 3 of Pragmata, the Terra Dome, to help keep you on track as you manoeuvre your way along these leafy corridors.
Keep in mind that major spoilers follow!
In this guide:
Entering the Terra Dome
Before entering Sector 3, do your usual Shelter upgrades. You may notice that your Shelter level has gone up once more, and you now have access to Training Simulations. These challenge rooms are accessible after talking with Cabin, and they’re worth doing if you want to easily unlock Cabin Coins. You’ll find more Training Simulations as you progress through the rest of the game.

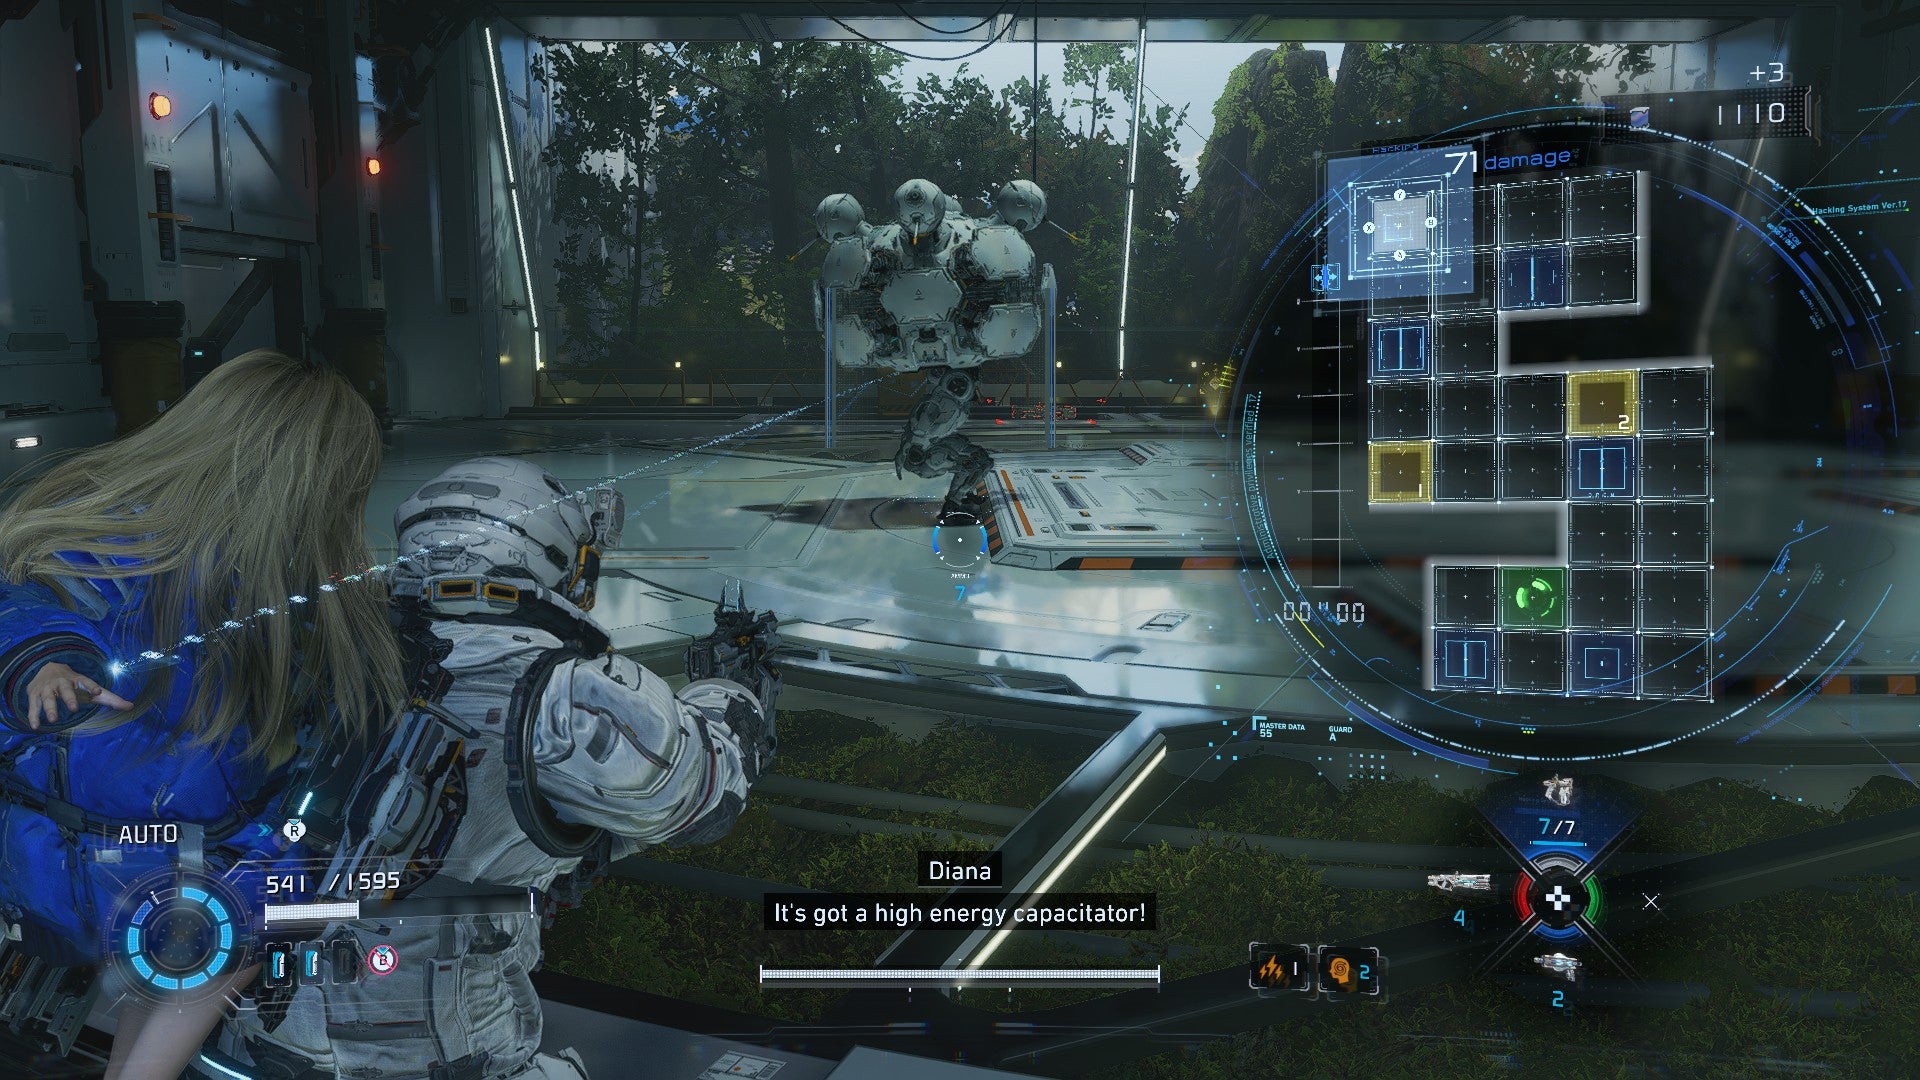
When you’re ready to proceed, take the Tram to the Terra Dome. Pretty place, isn’t it? Cross the bridge from your entry point; there are some Hacking Nodes you can grab if you go down the pathways on both sides of the bridge, and there’s a Walker hanging out by an Upgrade Component near the grassy section. Once you cross over to the other side you’ll face a new variety of robot, the Lancer, that charges up a laser sword. These guys can be a problem in combat, but the disc on their head is a weak point, and it’s super satisfying to steamroll them with a good Critical Shot.
Go through to the next room and observe how the plantlife has taken a little too much fertiliser. Interact with the control panel in front of the mess of roots blocking your way. Then turn around and you’ll spot the Central Life Station Escape Hatch and a hole in the glass to your right. Enter it and watch the cutscene with the cat. Apparently, you’ll need to reboot some Lim Regulators to take the lift up to Eight’s location.
Rebooting the Lim Regulators: Plant Factory

Before we go too far, turn left of the Plant Factory door and climb onto the tree roots and broken platform to find abother REM – this time some Flowers.
Now, head through the door marked Plant Factory to find yourself immediately confronted by Lancer and Crusher bots. Dispatch them and take the lift. This leads to a lobby with a screen warning that you’ll need to pass through either Decontamination Room A or B up ahead.
The choice is yours depending on what enemies you want to fight. Decontamination Room A features two advanced Walker units and an Impeder (a bot that can lay down electrifying spots on the ground for you to step on), while Decontamination Room B has two regular Watchers and two Impeders. Room A is probably a little easier, since Impeders can take some getting used to, but Room B has an Upgrade Component. But the choice is yours – just note that as soon as you walk into the vicinity of either room, you’ll be blocked in and forced to commit to your choice.

Once you survive the gauntlet, you’ll be in front of another Red Zone that you can enter if you’ve got a key. If you don’t, you can drop down the right path to face two regular Crusher bots and two Crusher MK-IIs. Nevertheless, I recommend the Red Zone – it’s a difficult area with a sweeping laser that will threaten to slice off portions of your health bar as you contend with multiple bots, but clearing it will unlock a whole row on Cabin’s Stamp Club, and Bingo is obviously the priority here. (If you’re low on gear, there’s a Unit Printer machine in the Red Zone that you can use to print out new weapons, and a chest containing Pure Lunum is next to it.)
In the next area, a new bot with four head-like orbs will appear to make your life difficult. Hacking this one’s a pain, as it has a hardy exterior and its matrix is complicated. That said, once it’s in an OPEN state, you can shoot those four heads for maximum damage, which is highly satisfying.
Defeating the four-headed bot and the reinforcements who follow will take you into another room where you’ll get good rewards, including the Cheap Shot Mod, which increases attack power by 15% when attacking enemies from behind, and some Training Data, which will load into the Training Simulator back in the Shelter and give you a new challenge room.
Opposite of all of these goodies is a glass chamber; here you can see some holographic deer standing around. You can stand in front of them to teach Diana about the majesty of Earth’s antler-possessing creatures, and when you’re done with nature documentary time, grab the new weapon unit nearby. This is the Pulse Carbine, a highly useful automatic rifle that’s much speedier than your current gun. Use it to blast weak points and increase heat buildup in your foes.

Beyond the Pulse Carbine is another control panel that you can interact with to move the trees blocking the central lift. You can then return to the central area and get ready to tackle the next segment of the Terra Dome.
Rebooting the Lim Regulators: Eco Modeling Lab
Time to head into the Eco Modeling Lab. Entering reveals a glass chamber with butterflies, which cues another lovely cutscene where Diana learns about insects for the first time.
Further on is a room with multiple glass tubes containing growing trees. Once you’ve taken care of the enemies around here, read the screen to learn about how the Lunafilament-printed trees are totally managed by AI, though some manual handling with a Gen Chip is required. Hmmm, looks like that manual handling hasn’t happened in a very long time, and the AI has probably gone nuts producing slop.
Go up the stairs to see a computer unit with a red line extending from it. You can’t interact with this yet, nor can you reach the staircase that leads to a higher stretch of the room. The computer appears to have been halfway through printing the tree branch in front of you, which means we’ve got to find the Gen Chip needed to finish the printing process. Before we embark on this quest, turn around and look up to pinpoint the first Mini Cabin Figure in this level, nestled in the roots along the ceiling above you.


Hop down to the ground and investigate your surroundings. You’ll see a pathway that’s covered in seemingly natural earth, looking like it leads into the forest. Head down there and get ready to battle an Impeder. After it’s dead, activate the console behind it to grab the first Gen Chip. With this in tow, you can now head back up and insert it into the main console with the red line. Printing will ensue, and then you’ve got a tree platform that you can use to jump across to the previously inaccessible staircase.

When you’re on the other side, turn right and head to the wall to discover that it isn’t really a wall at all! This hidden area leads to a chest with 300 Lunafilaments and a tablet that talks about weird occurrences in this section of the Cradle. You’ll also spot a wall of lasers that seem to block progress to an Upgrade Component; stare out the window to notice a circuit panel that you can hack from outside to get the lasers to fall.

Exit through the door on the opposite end of this upper area. You’ll come face to face with three tree printing units that are out of comission, each in need of Gen Chips. More stuff we need to run around and find, great. Luckily, the Envirolytics Lab Station Escape Hatch is here for you to use if you need a breather back at the Shelter. You should also use the Lim Eraser on a blockage by the roots left of the three units to get an Upgrade Component.

To the right is another Red Zone – probably the hardest one yet. It’s a multistored room, and you need to climb platforms and tree roots to defeat all of the bots that await you. If you fall, a slew of rotating lasers on the ground are designed to chip away at your health. Throw in Watchers chucking missiles your way, Impeders placing mines on the ground, and Lancers charging with their lasers, and you’ve got one heckuva challenge. Clearing this room wins you the Collateral Damage mod – which makes 30% of Critical Shot damage spread to nearby enemies – along with some Pure Lunum.

When you’re finished with the Red Zone (or if you’ve decided to skip it), go down the stairs, defeat the robot and pick up the Gen Chip by the tree with orange leaves. To the right of this is another Upgrade Component and a somewhat-obscured Walker; behind them is another REM – a collection of Balloons!
While you’re here, take the grassy path here that veers right. It leads to an Upgrade Component and another hidden wall to the left; watch out for the Crusher hiding here, then climb onto the platform to your left and jump over to find a chest containing the Recursive Learning Mod, which increases the hacking gauge buildup by 15% after a successful hack.
After you’ve grabbed the Mod, you can also keep progressing on the thin white platform until you get to a group of 3D-printed blockages that you can use the Lim Eraser on. When they’re out of your way, the resulting room holds a chest with a bunch of Lunafilaments, but also five bots you’ll need to take out.
Once you’ve had your fill of collectibles, return to the tree printing units and insert the Gen Chip to make new branches appear. Jump across them to reach the area with the prominent orange tree. A new form of the Crusher will emerge as soon as you get close.

If you want to break this bastard’s grid down to size, pick up the new weapon by the orange tree – Sticky Bombs. These suckers attach to an enemy, temporarily shrink their matrix, and deal damage upon explosion, with effects that can stack! Awe yeah. Use ’em to make the advanced Crusher toast, then grab the next Gen Chip from the computer under the tree.
Head up the ramp from the orange tree to find a room with a Red Gate Key, a file that warns of simulated weather conditions (hmmm, is that foreshadowing something?), an Upgrade Component, and a chest with the Aggressive Defense Mod, which cuts down damage by 20% when you’re aiming. The Meteorology Sim Lab Station Escape Hatch is here as well.
From the Escape Hatch, go up the stairs and hack the nearest door to be tossed into another gauntlet of enemies. Expect to face Crushers, those improved Crushers with a paint job, and Walkers. Great chance to break out the Sticky Bombs and let ’em all know who’s the main man (plus cute robot sidekick) around here.
However, to make things more interesting, lightning strikes will periodically hit the arena, targeting the yellow circles that always seem to conveniently appear near you. (You do remember that recent tidbit you read about simulated weather, don’tcha?) Don’t be standing around when the thunder strikes, in other words!

After this enemy room is wiped out, proceed to the next room, pick up the Upgrade Component and the Decoy Generator on the balcony, then drop down to do it all over again. This time, you’re facing a host of Walkers, and if you time things well the lightning can knock most of them down in a single strike. (Diana comments that she likes “happy weather” more at the end of all of this – you and me both, kid.)
Go through the door at ground level to find a holographic conversation between two scientists talking about the lightning generators. Then head over to the green part of the room to find the final Gen Chip. That’s all three accounted for, at last.

Exit via the closest door and drop down. Hack the next door, kill the Walker and Lancer who come at you, and head up the stairs to return to the area with those three tree-generating units. Pop the last two Gen Chips into the consoles and watch as Lunafilament-generated nature does its thing. All you need to do now is make some gentle platform jumps up the newly-birthed branches to the next door – but if you’re low on health, pop back to the Shelter first, as a battle’s coming up.
When you do proceed onwards, another SectorGuard mini-boss alongside two Lancers await you. In case you’ve forgotten how to kill this Robocop reject, dodge when the SectorGuard makes a tonne of red circles on the ground, as missiles will soon follow. Shoot the weak spot on its back, and if you can, terminate the Lancers first, as they can be a right pain in the arse otherwise.


When the fight nears its end, yellow circles will also start appearing on the ground alongside the red. In other words, if missiles weren’t bad enough, now lighting’s gonna attempt to fry your butt. Chaotic, isn’t it?
When that extremely overstimulating fight finishes, pick up some well-deserved Pure Lunum in the next chest you come across. Then jump down into a new room with a Firmware Update computer smack dab in the middle. Interact with it and you’ll gain an additional Weapon Slot! Whoo-hoo!

Following this, all you’ve got to do is proceed to the next room and interact with the computer to remove some trees. At last, you’re back in the room with the central lift. If you’ve been following this guide and already hit up the Plant Factory, you’re now ready to meet Eight.
Meeting Eight
Ride the lift up and open the first blue chest you see to obtain the Precision Shot Mod, which slows time and increases weapon damage by 10% when you successfully pull off a Fast Move (the game’s term for dodging attacks at the last second). Neat. There’s also the Central Lift – Upper Floor Station Escape Hatch here.

When you’re ready, walk up the stairs and there you’ll see Eight. She also appears to be a Pragmata who bears an uncanny resemblance to Diana, and only by accessing yet another Lim Regulator can we free her. This one’s underground, and the only way to reach it is via the Soil Research stretch of the Terra Dome. Sigh… Why not, I could use another robot kid on my squad. It’s off on another merry sidequest we go!
Soil Research
The Soil Research area is located back by the Escape Hatch you just unlocked. Enter, then walk into a dark, circular area with a chest slightly hidden away behind a corner; there’s a Cabin Coin inside. Grab it and head towards the light to be greeted by a lovely artifical beach. Diana will enjoy the water, Hugh will open his helmet for the first time in a while, and it’s sorta like that scene in Project Hail Mary, except with a robot kid instead of an alien rock.

When this touching moment finishes, comb the beach for an Upgrade Component (no seashells here, sorry) and enter the next grassy area to see what is surely becoming a recurring horror in Pragmata – “another damn locked door” (Hugh’s own words, not mine) with four thingies that you’ve got to find to open it. The terror, the terror.

Happily, these locks aren’t as hard to find as the others you’ve had to contend with, and the hackable interface next to the door opens door lock 01. To the right of it are two Walkers and another control panel that opens door lock 03.
To find the next two locks, follow the pathway downwards until you reach a lower level of the Soil Research facility that’s very, very dark and a bit spooky. Resident Evil vibes abound! Hugh has to activate a flashlight to see, and as soon as you enter a circular room, you’re going to get ambushed by an invisible robot. This frightening bastard uses some kind of cloaking device, and it’ll pull Hugh into its clutches if he gets too close, forcing Diana to pull off a fast hack to save him.


The best way to dispatch this cloaked bot is to watch out for the telltale shimmer that it creates as it moves about incognito. Fire into the shimmer to make it appear, then hack away at its matrix to make it more vulnerable. Hitting it with Sticky Bombs is also a great way to disrupt its invisibility. Granted, all of this is easier said than done, especially in such a dark room.
Once the invisible bot is dead and the area secured, hack the control panel on the wall to open door lock 02. One more to go. Move onwards to the lift to find a new weapon – the Photon Laser, a powerful beam that reduces mobility but cuts through bots like butter. Ride the lift upwards, defeat the next group of enemies, up top, and then turn towards the tree to find a Mini Cabin Figure.

Progress into the next hallway to face down another one of those round four-headed robots. Alas, an invisible bot is here as well, and will try to grab you from behind when you’re blasting ol’ four-eyes. Use the Photon Laser to fry them both, along with the Walker who tries to join in on the fun. When they’ve all been taken care of, open the chest for two Upgrade Components and hack the last control panel to open door lock 04.
Jump down to beach level – if you time your jump carefully, you can find a chest hidden amongst the tree with 400 Lunafilaments inside. Once you’re on the beach, be on the lookout for the telltale shimmer of yet another invisible bot who will appear right as you get close to the entrance where the door with the four locks is. Not cool, man.

When you’ve put that nasty jumpscare behind ya, enter the door you’ve worked so hard to unlock, read the ominious message about jamming signals, and activate the GeoScience Lab Station Escape Hatch. If you need it, head back to the Shelter for a breather – you deserve one after all that.
The next area below the Escape Hatch is full of devices sending out the aforementioned jamming signals, which appear as pink circles that gradually pulse around the room, throwing off Diana’s hacking capabilities. These are supremely annoying, but if you jump over the circles then Diana can hack them as long as you’re fast. Do so, then use the Lim Eraser here to open up a path to a chest with Lunafilaments.

Hack the door marked “Sec .06” to enter another dark room. You guessed it, an invisible bot is lurking around these parts. Fry the tincan with the Photon Laser before it can grab you, then do a sweep around the room to find Upgrade Components, a Data Shard, and a console that you can interact with to remove the tree roots blocking a door that leads down one more level.
Hack the signal jammer down here, take care of the Crusher MK-II and the Walkers, and keep moving as you enter a room with a Unit Printer and a table with what looks like a holographic model. There’s a side room attached to this one that was used by the Cradle’s scientists for relaxation purposes; you can find a conversation here and a cute “2026, it’s real” note on one of the beds. (This was used in one of Pragmata’s trailers to hint at the game’s release date after many considerable delays.)


You’ll see another REM through a window of this room; to get it, exit and immediately turn left. (Don’t enter that yellow barrier in front of you just yet!) Use the Lim Eraser to clear the blockage, and then jump up to make it to the Swing Read Earth Memory. If you look carefully in a storage container next to the REM, you can also find the last Mini Cabin Figure of the Terra Dome.

Regarding that yellow barrier – this is a security zone, and you’ll be stuck facing off against a horde of opponents and signal jammers once you step within and drop to the ground level. Alas, you cannot hack the signal jammers before you enter, but before hitting the ground, you can hop to the upper platforms to grab a Cabin Coin and two Upgrade Components in chests. (There’s a wall panel you can hack here, making it easier to reach these upper platforms.) Then, go in guns blazing and prepare to face two of those four-headed bots along with your usual assortment of Lancers and Interceptors.

When the dust settles, go into the following dark room, get your Pure Lunum, and keep progressing until you see a lift. Don’t take it up yet; instead move through the doorway until you’re in another room that has a big holographic model on it. You can read the GeoScience Lab Development Plan here and get another Upgrade Component.
Now it’s time to take the lift, which leads downwards and places you in front of an ominous “DO NOT ENTER” sign in front of the next door. Take a right to find the panel you need to hack to open this, along with a creepy message about bots going haywire and killing people on IDUS’ orders. Yikes. While you’re at it, unlock the Cultivation Lab Station Escape Hatch. Yep, boss time awaits.
Creator boss fight

Go down, down, down, until you’re in a tree zone where the Creator is gonna come at you again, this time in a terrifying new form that resembles an insect (or perhaps a lizard) more than ever. Fire up your Photon Laser and shoot to kill. Avoid this big boy’s pounces and its scorpion-like tail stings, and blast at the rods on its underbelly for a weak point. Deal enough damage, get in close for a Critical Shot, rinse and repeat.
Halfway through the fight, the boss will jump up onto the wall and start firing an arc of lasers down in your general direction. Hugh and Diana need to slip in between the gaps of the lasers to survive, and usually there’s a horizontal laser arc followed by a vertical one. Missiles will come flying your way in between these series of lasers, so make sure Diana is fast with the hacks to redirect them.

It’s a tricky boss battle to be sure, and it helps if you’ve got an Overdrive Protocol up your sleeve. But once this robot lizard denizen is down for the count, you can finally activate the Lim Regulator that frees Eight. Man, was this Terra Dome a loooong Sector to get through.
Good job helping Eight and taking a lengthy sojourn into nature in the depths of outer space. That’s a wrap on Pragmata’s Sector 3, the Terra Dome. Head back to our Pragmata walkthrough hub to get ready for the next part of your journey – the deep, dark Lunum Mines await.